LinkedIn is a great platform for gaining organic exposure for your posts and blogs. But how do you get a potential reader to click on your link?
To get traffic, one thing you need to be on top of is making sure you have presentable link previews. Link previews usually contain all the info a reader is looking for — the title, description, and featured image of the web page. This summary has to convince your audience to move off social media and onto your site. You need to have tight control over how it looks.
But if you’re sharing posts on different social media platforms, you might’ve noticed that some of them preview your website post differently. That’s because each social media site has different methods to collect link information. As a result, link previews can often appear inconsistent, or sometimes flat-out broken, which leaves a negative impression on potential visitors.
Your LinkedIn link previews are one of the keys to attracting website visitors. In this post, you’ll learn how to avoid outdated page link previews and how to customise them to display the right image and title.
Let’s get started!
What are the link preview specifications?
LinkedIn generates link previews for links added to your organic posts. The preview should contain the following:
- Title (150 characters max)
- Image (ratio and width should be approximately 1,200px+)
- Comment (optional – 1,300 characters max)
What is the OG Protocol?
When you share a website post on LinkedIn, it collects metadata from the website page. The Open Graph (OG) protocol describes the data using <meta> tags to help social media sites like LinkedIn decide what information it needs to generate link previews. LinkedIn collects the following OG meta tags:
- og:title – describes the title of the content
- og:type – describes the type of content (video, image, article, etc.)
- og:image – shows the preview thumbnail for link previews
- og:description – text that shows the summary of the content
- author – indicates the author of the content
In a link preview, LinkedIn will show the Title and Image metadata from the content.
Troubleshooting link previews with LinkedIn Post Inspector
Before you customise your post, you might also want to double-check if LinkedIn shows old data from the link preview. You can use the LinkedIn Post Inspector to refresh the link preview.
To start debugging your post, type its website URL and click the Inspect button.
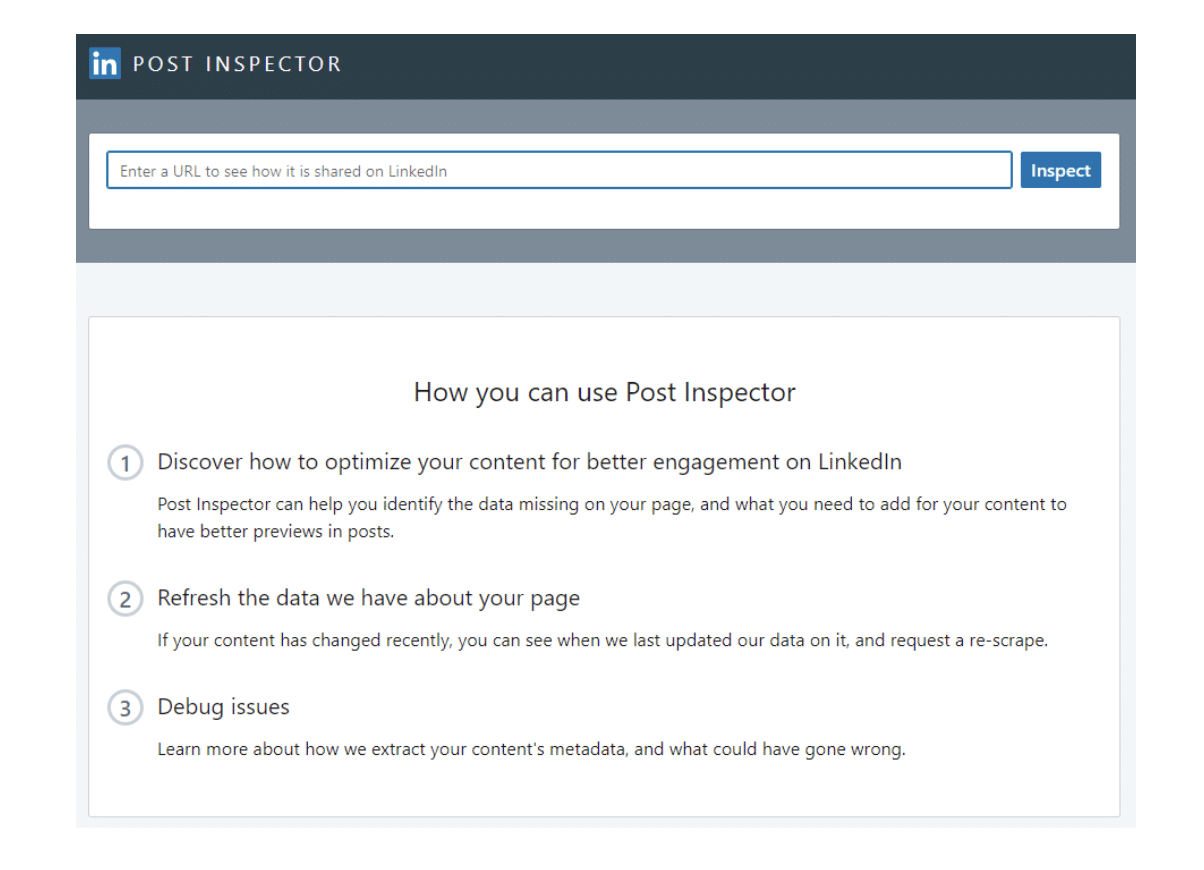
The Post Inspector will show you the URL information and refresh the cache.
Now, start troubleshooting the link preview by checking the following:
- Image (Is it displaying the correct image?)
- Title (Does it show the full title?)
- Error (Are you getting error messages?)
If you encounter any problems we’ve listed the quickest fixes below.
Changing your link preview title and image
Install a plugin to include Open Graph meta tags
- Install and activate the Yoast SEO plugin on your WordPress dashboard.
- Go to the new SEO item in the menu > Social (Yoast SEO).
- Go to the Facebook tab*.
- Toggle down to Facebook settings. Below, you’ll see “Add Open Graph metadata.”
- Click Enabled.
- In the Default settings, you can change the image URL if the post/page you share doesn’t contain any images.
*Although named Facebook, the OG metadata applies to other social media posts, such as LinkedIn.
Get the right images and text in the OG tags
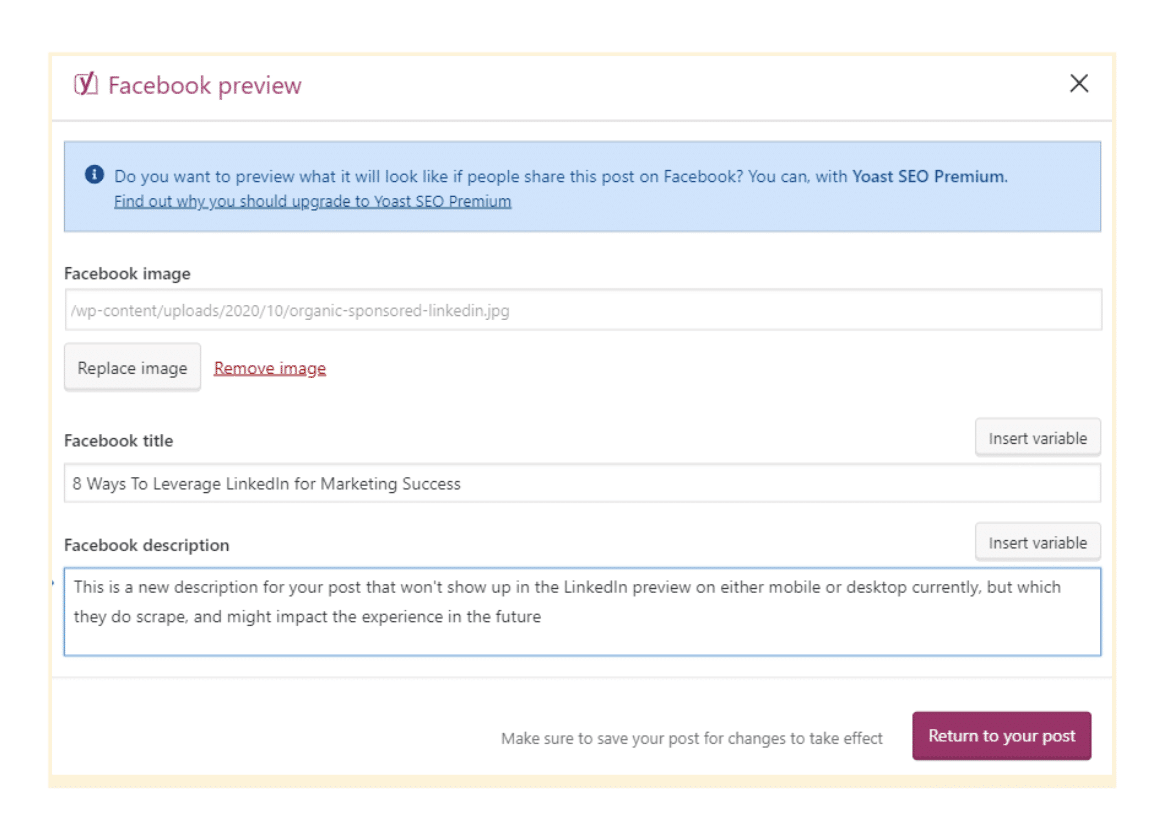
- Go to the Yoast menu and tick the box for Facebook preview.
- In this section, you can upload the relevant image from your media library and set the Title and Description of the post.
- Once you’re done, click Return to your post.
To make sure all the changes will reflect live on your site, make sure to clear and refresh your page (or site) cache. Then, go back to LinkedIn Post Inspector to check if the new image and title appear on the link preview.
And that’s it! Just follow these steps to change the WordPress page Link preview on your future LinkedIn Posts.